Last update:
Last verified version: AMC 3.2.1
Overview
ASGARD creates a certificate infrastructure during installation, including a self-signed Web UI certificate. When you first access the login page, the browser warns that the connection is not secure because the certificate is self-signed. However, the connection remains encrypted.
This article explains how to create a CSR in ASGARD and have it signed by your CA.
Prerequisites
-
Windows Server with Certificate Services installed
-
Or existing CA file
-
Root access to ASGARD
Expected result
The web browser accepts the UI certificate as valid.
Steps to proceed
There are several methods to sign the ASGARD generated CSR request. This article describes the two most common procedures:
Related Content
CSR Signing with a Microsoft Based CA
Open the Certificate Authority snap-in within Windows Server
certsrv – Microsoft Certification Authority Main Page
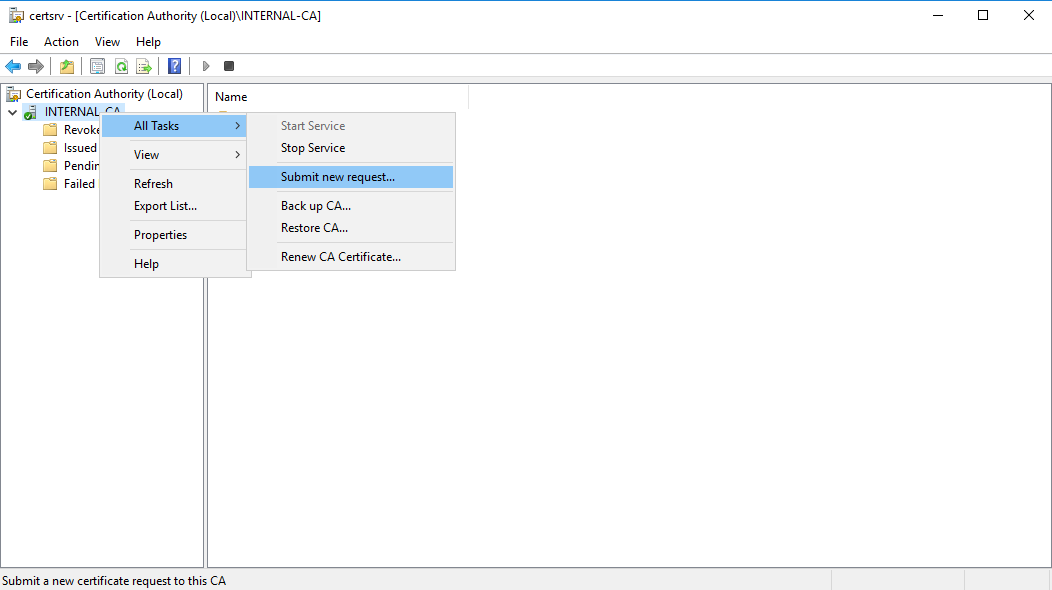
Right click your CA >> All Tasks >> Submit new request
certsrv – Submit new request
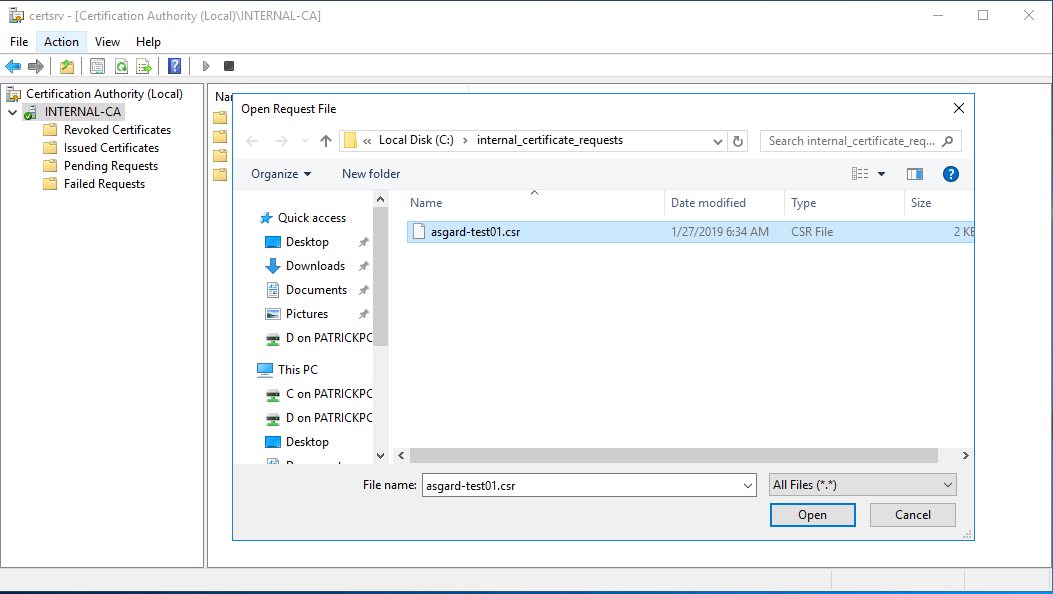
Locate and open the signing request file we've saved in previous steps
certsrv – Locate the CSR to be signed
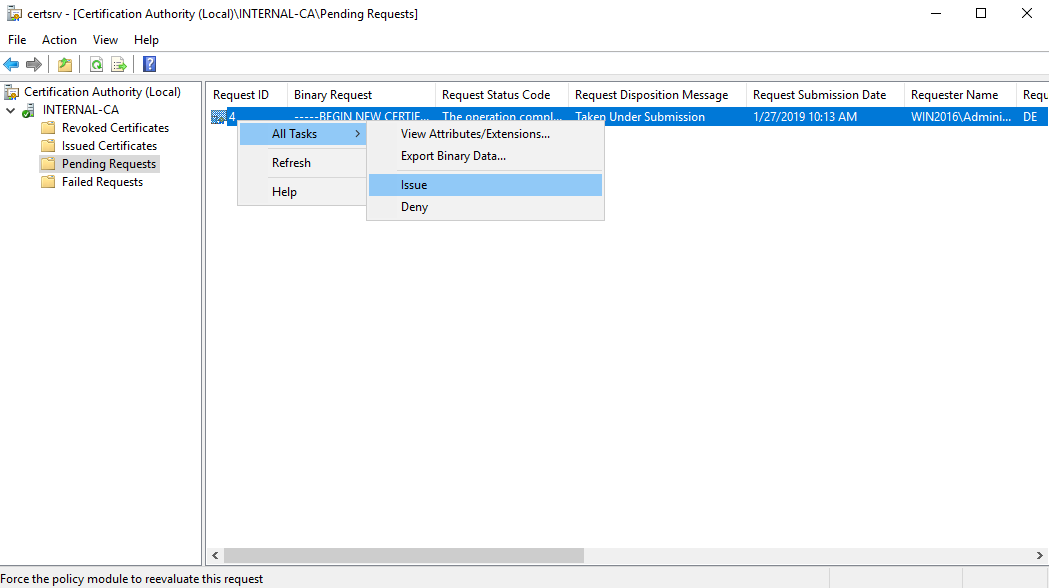
Navigate to the "Pending Requests" within your CA snap-in and right click the imported CSR >> All Tasks >> Issue
certsrv – Issue the certificate
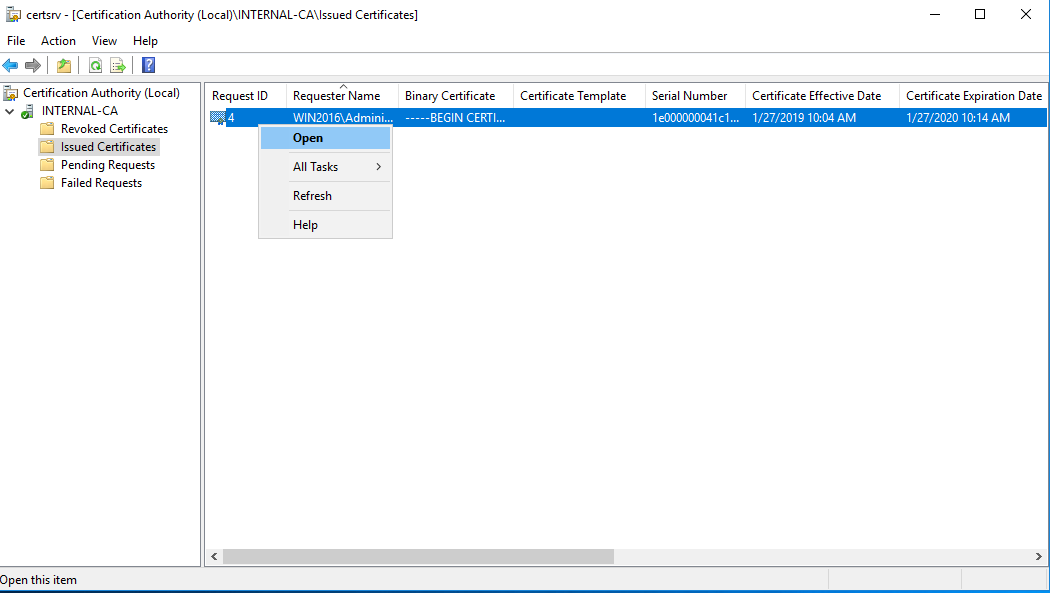
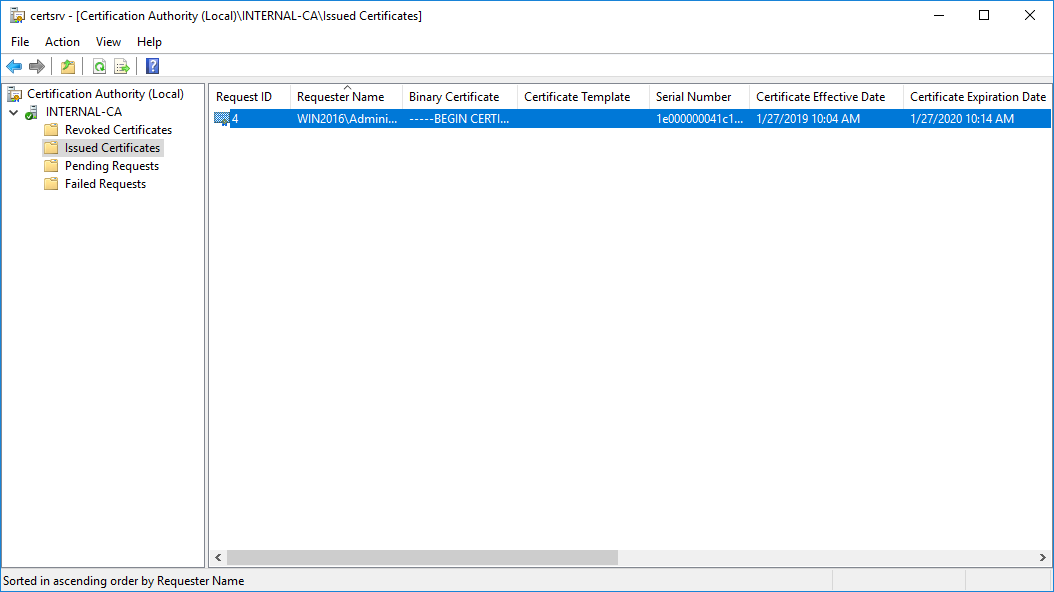
Once the certificate has been issued, it will be located under "Issued Certificates"
certsrv – Locate issued certificate
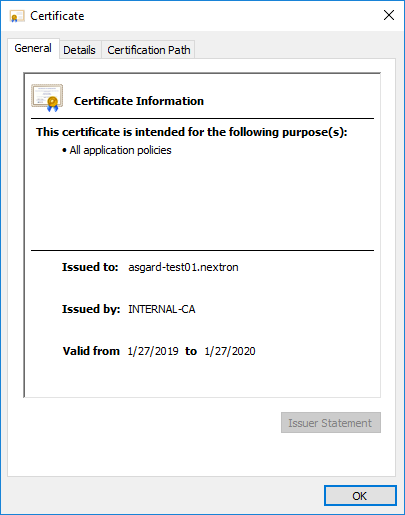
Right click on the issued certificate and click open
certsrv – Export certificate
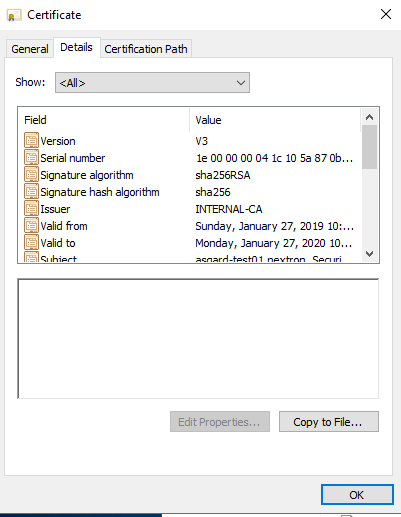
Inspect the information of the Certificate and continue to the next step, if the presented data is correct.
certsrv – Export certificate
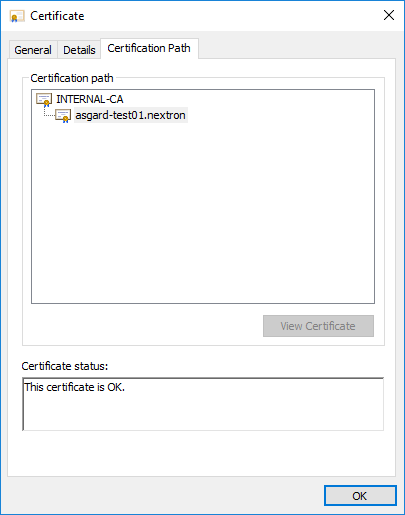
Check that the generated certificate has a status of OK
certsrv – Export certificate
Navigate to the Details tab and click "Copy to File…"
certsrv – Export certificate
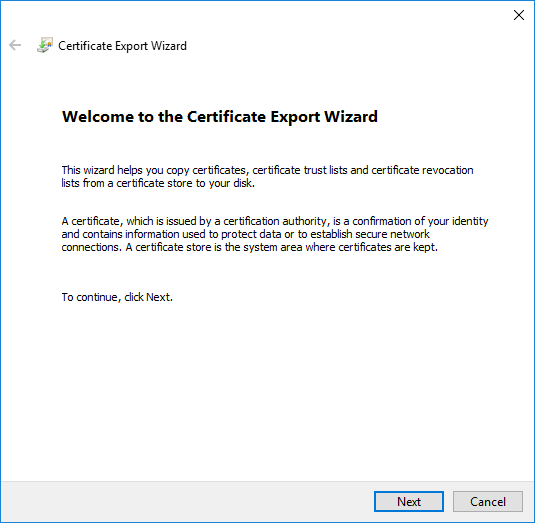
On the Certificate Export Wizard – click Next
certsrv – Export certificate
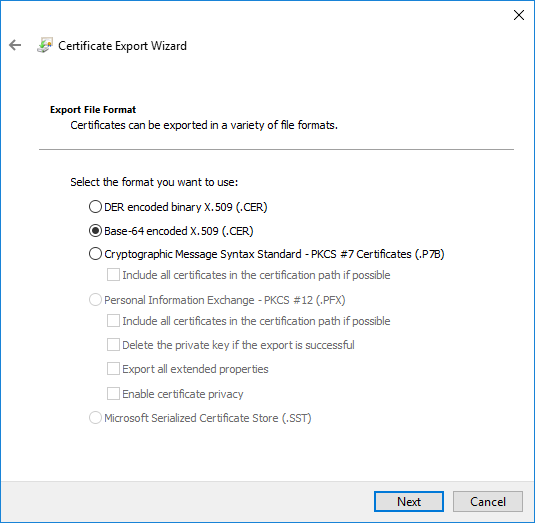
Select Base-64 encoded X.509(.CER) and click Next
certsrv – Export certificate
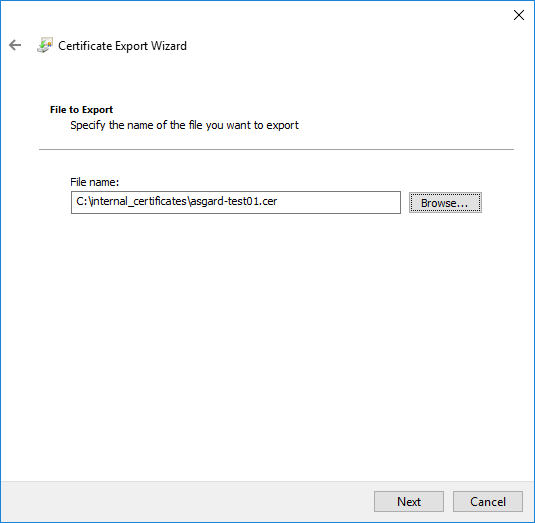
Choose an output location and click Next
certsrv – Export certificate
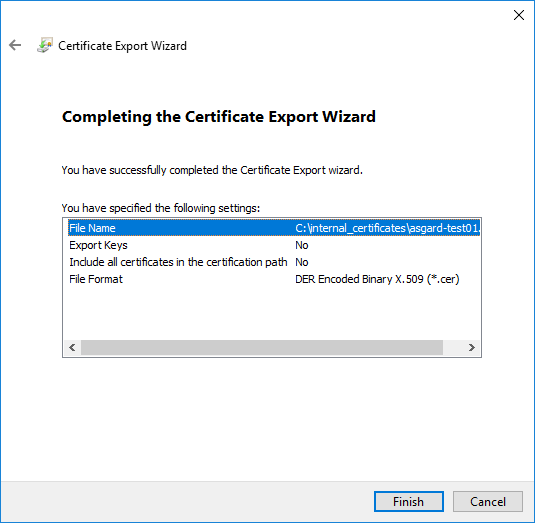
Click Finish - Once the confirmation message box pops up, click OK
certsrv – Export certificate
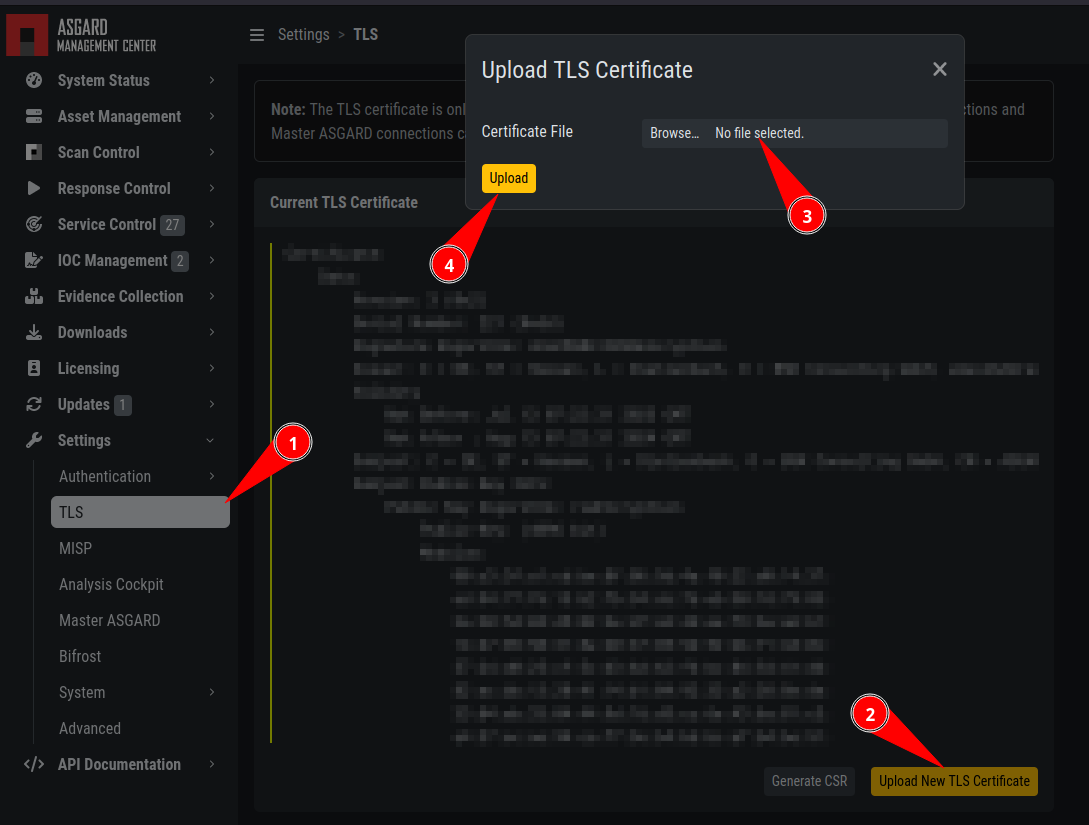
Navigate to Settings >> TLS.
On the bottom of the page click Upload TLS Certificate and select the exported certificate from the previous step.
ASGARD Certificate Import
If all steps were followed, a message box should pop up indicating that the certificate was successfully installed.
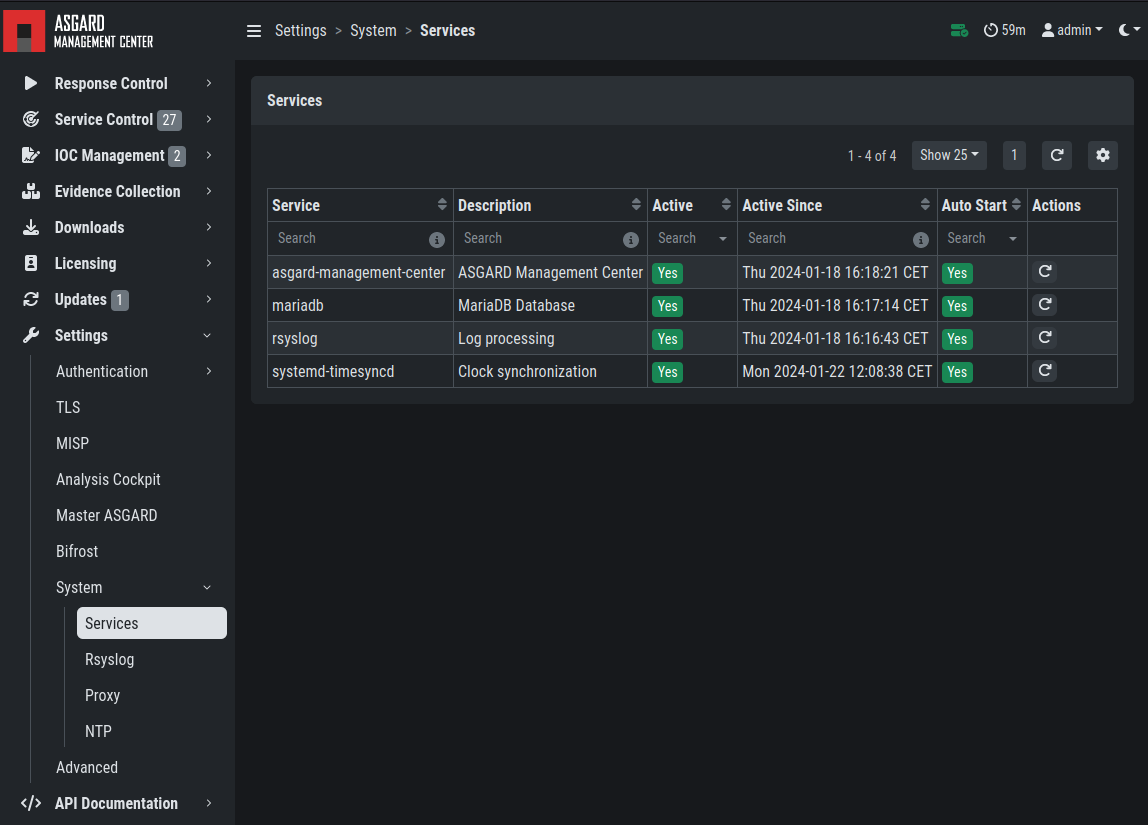
Navigate to Settings >> Services and restart the ASGARD 2 Service by clicking Restart button.
ASGARD service restart
Please take into consideration that it could take a few minutes until the ASGARD Service is restarted successfully.
After the service has been successfully restarted, the installed certificate will be used by your Management Center.
9.5.2. Use Case 2 - CSR Signing with an OpenSSL Based CA
Warning
In order to avoid security warnings 1 on some browsers, the CA signing process needs to ensure to copy all Subject Alternative Name (SAN) from the CSR to the signed Certificate.
[1]
These security warnings are a result of an incomplete signing process, where requested attributes from the CSR are not included in the signed certificates (subjectAltName).
There are two ways of doing this while singing the CSR via openssl.
The first method of including all extensions from the CSR to the new certificate, is via the openssl.cnf file, by uncommenting the copy_extensions attribute.
The location of the openssl.cnf file depends on your system. On our test system, this file was located at /etc/pki/tls/openssl.cnf.
Warning
Please make sure to comment the line out again once you are done with singing your CSR.
Example:
####################################################################
[ CA_default ]
dir = ./demoCA # Where everything is kept
certs = $dir/certs # Where the issued certs are kept
crl_dir = $dir/crl # Where the issued crl are kept
database = $dir/index.txt # database index file.
#unique_subject = no # Set to 'no' to allow creation of
# several certs with same subject.
new_certs_dir = $dir/newcerts # default place for new certs.
certificate = $dir/cacert.pem # The CA certificate
serial = $dir/serial # The current serial number
crlnumber = $dir/crlnumber # the current crl number
# must be commented out to leave a V1 CRL
crl = $dir/crl.pem # The current CRL
private_key = $dir/private/cakey.pem # The private key
x509_extensions = usr_cert # The extensions to add to the cert
# Comment out the following two lines for the "traditional"
# (and highly broken) format.
name_opt = ca_default # Subject Name options
cert_opt = ca_default # Certificate field options
# Extension copying option: use with caution.
copy_extensions = copy
[...]
The second method of including all extensions from the CSR to the new certificate, is via an extension file (for example asgard-test01.ext) containing all your subjectAltName entries. This tells openssl to use a extension for signing the CSR. In our case the extension contains a list of subjectAltName values.
To do this, place a file with your subjectAltName entries in the same folder of your CSR. The contents of this file look something like the following example. Values after subjectAltName = should be equal to the values of your CSR:
cat asgard-test01.ext
subjectAltName = DNS:asgard-test01.nextron, IP Address:172.28.28.101
The content should be identical to the values you set in your CSR. You can inspect those with the following command:
openssl req -in asgard-test01.csr -noout -text                                                                                                                [31/146]
Certificate Request:
 Data:
     Version: 1 (0x0)
     Subject: C = DE, ST = Hesse, O = Nextron, OU = Security IT, CN = asgard-test01.nextron
     Subject Public Key Info:
         Public Key Algorithm: rsaEncryption
             Public-Key: (4096 bit)
             Modulus:
                 00:cb:74:c9:ed:4e:4d:db:39:7b:e0:dc:bb:55:d6:
                 [...]
                 c2:9f:69
             Exponent: 65537 (0x10001)
     Attributes:
         Requested Extensions:
             X509v3 Subject Alternative Name:
                 DNS:asgard-test01.nextron, IP Address:172.28.28.101
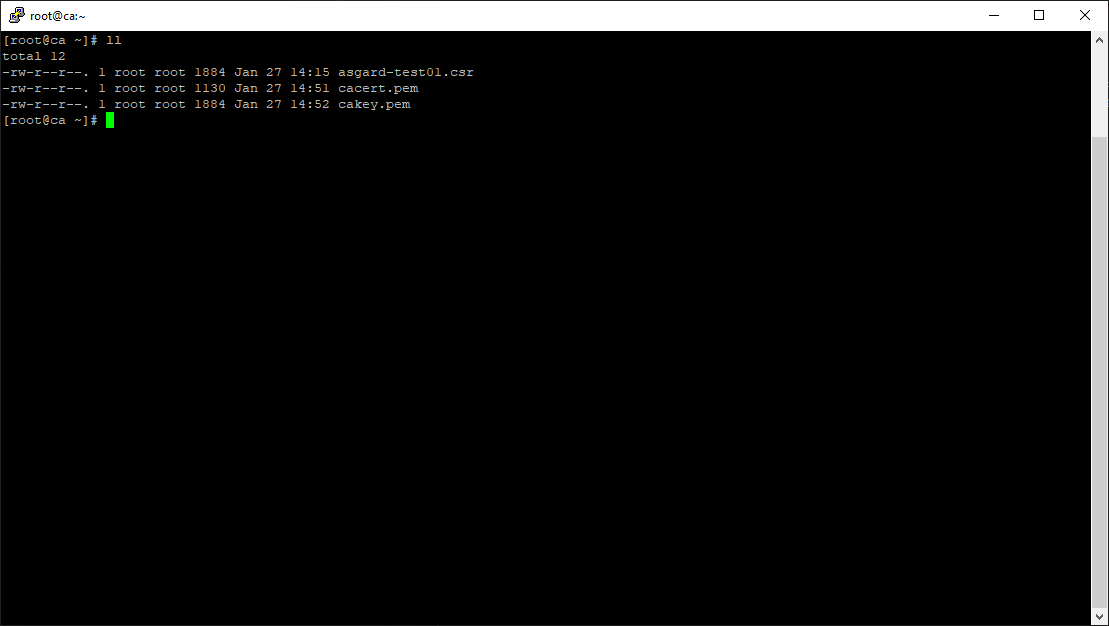
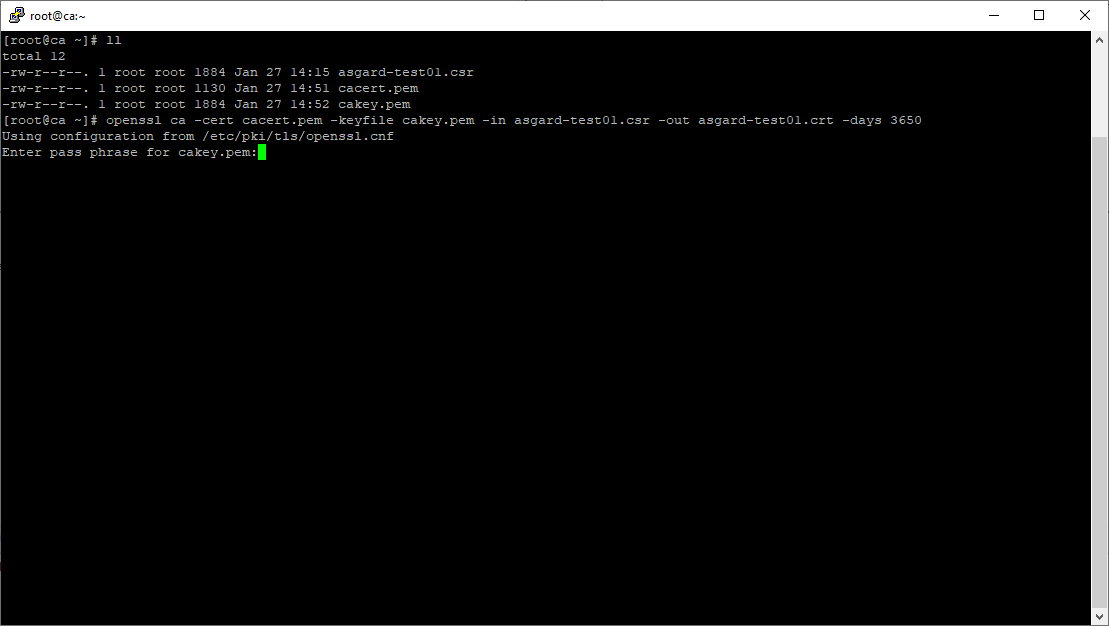
Prepare the CA certificate, CA private key and the certificate signing request (and optionally your extension file, if you chose method 2).
CSR and signing Certificates preparation
Execute/adapt the following command depending on the method you chose before:
First method:
openssl ca -cert cacert.pem -keyfile cakey.pem -in asgard-test01.csr -out asgard-test01.crt -days 3650
Using configuration from /etc/pki/tls/openssl.conf
Enter pass phrase for cakey.pem:
Certificate signing command

Second method:
openssl ca -cert cacert.pem -keyfile cakey.pem -in asgard-test01.csr -out asgard-test01.crt -days 3650 -extfile asgard-test01.ext
Using configuration from /etc/pki/tls/openssl.conf
Enter pass phrase for cakey.pem:
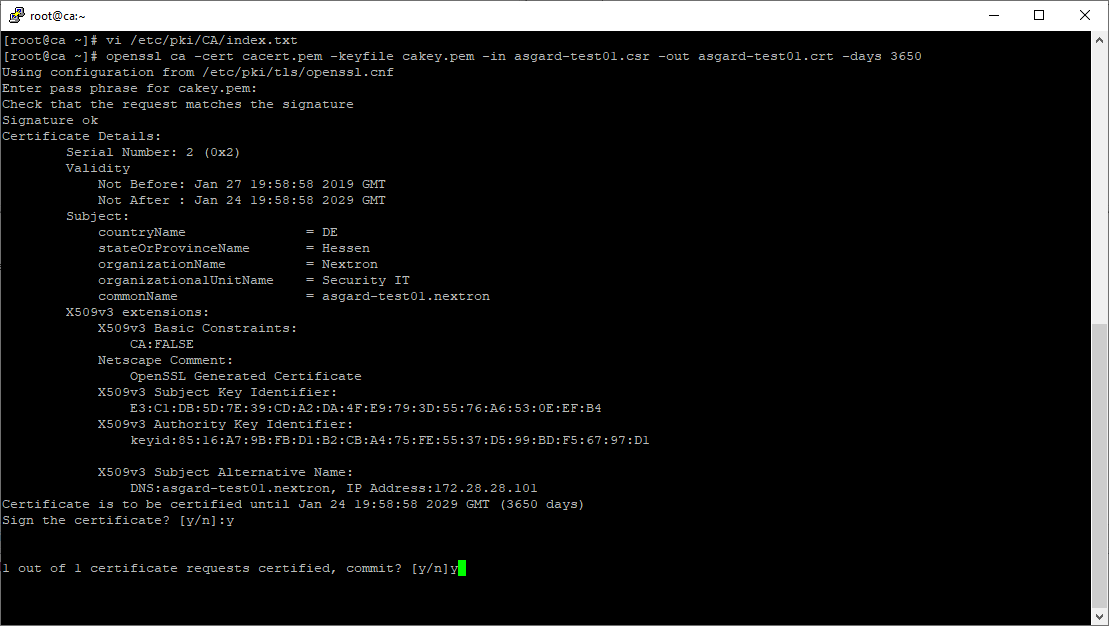
Check that the request matches the signature
Signature ok
Certificate Details:
Serial Number: 1 (0x1)
Validity
Not Before: Feb 23 09:58:10 2023 GMT
Not After : Feb 20 09:58:10 2033 GMT
Subject:
countryName = DE
stateOrProvinceName = Hesse
organizationName = Nextron
organizationalUnitName = Security IT
commonName = asgard-test01.nextron
X509v3 extensions:
X509v3 Subject Alternative Name:
DNS:asgard-test01.nextron IP Address:172.28.28.101
Certificate is to be certified until Feb 20 09:58:10 2033 GMT (3650 days)
Enter the passphrase for your CA's private key
Signing procedure
Confirm that the data contained in the CSR is accurate and confirm the signing of the request to the CA.
Signing procedure – Checking data is accurate
Once confirmed commit the changes to your local DB.
Signing procedure – Committing changes
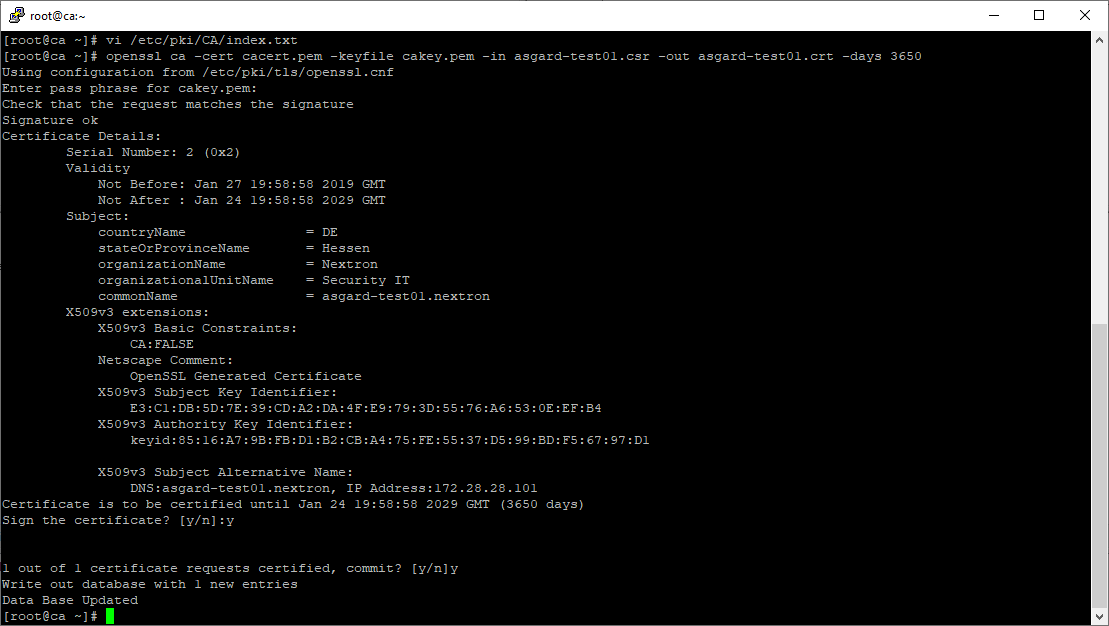
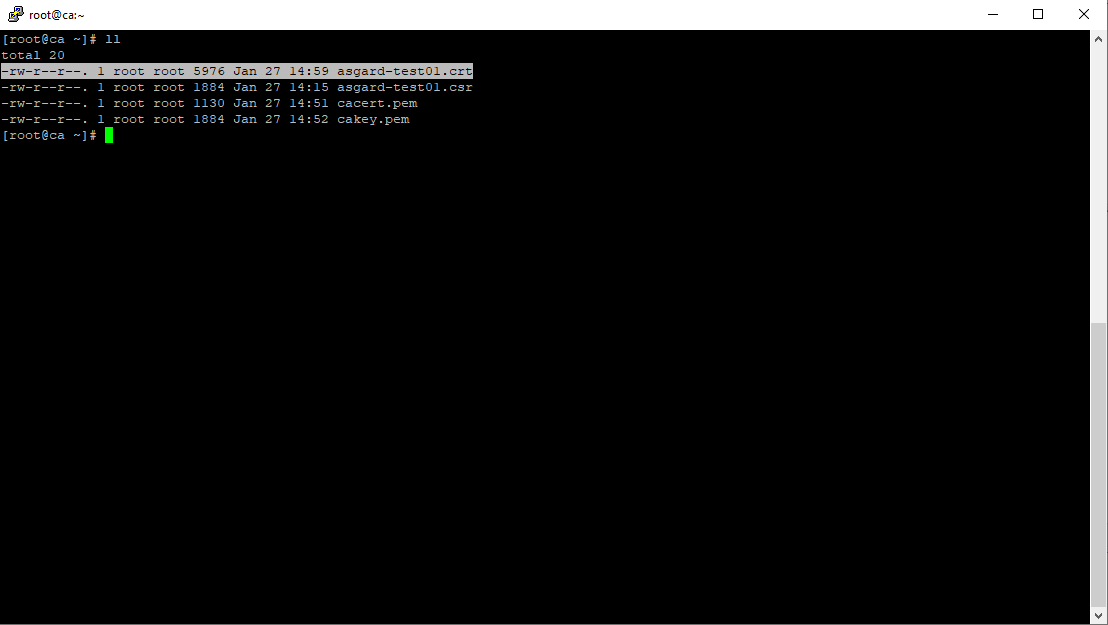
As a result, the signed certificate will be available with the indicated filename.
Signing procedure – Locating the generated certificate
As a last step, the generated certificate can be imported following the TLS Certificate Installation steps.